I never started an upgrade thread for myself, so I thought I would start one now.
But my goal is not just to show-off my set-up, but also, hopefully, pass along knowledge and possibly inspire others with ideas.
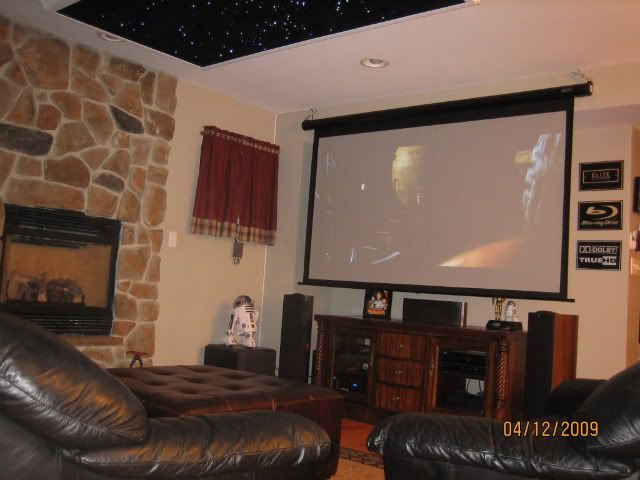
Here's a recent pic of my set-up, please go to my gallery for more pictures since I will focus more on upgrades here.
 First a little background:
My current set-up includes dual displays (60" plasma and 92" electric screen) in a multipurpose room. My goal has always been to set-up a 2.35:1 Constant Image Height (CIH) set-up, but like most of you, I do not have a dedicated HT room, which means I cannot build my own screen, which means my options are limited. My only solution was to find a retractable/electric 2.35:1 screen and the means to project it from my "zoom-less" projector..... oh and by the way, I am not rich - so a $2K+ screen and $2K+ anamorphic lens are out of the question.
2.35:1 Screen solution:
I'm not sure what gave me the idea and I am sure I am not the first to do this, but all of a sudden I thought, "how about a bigger 16:9 screen that I can drop down to a 2.35:1 aspect ratio? I researched this and calculated that I would need at least a 122" diagonal 16:9 acreen, so that I can drop down to the same height as the existing 92" screen, but a width of about 106", hence a 2.35:1 AR. Sure enough, I found an Elite 125" 16:9 electric screen for under $300! My existing screen is also an Elite electric screen. My plan was to hang the second screen below and in front of, but staggered from my first screen. This way the two screens could be dropped down with my Harmony One independently and with no interference. Here's a diagram to better explain my idea.

The beauty of this idea is that I would still have a 60" Plasma and with my existing projector/92" screen, I would still be able to watch 16:9 content from DirecTV and some blu-rays. But now, with a click of a button on my Harmony one, I will also be able to drop down the new screen and watch cinescope/2.35 content - which is the AR of most blu-rays! No more black bars! So here's my new screen set-up with 3 modes:
Mode 1: General/daytime use - Plasma

Mode 2: DirecTV and some Blu-rays - PJ w/ 16:9 Screen

Mode 3: Almost all other Blu-rays - PJ w/ 2.35:1 Screen

Screens in Action:

I am not finished with the vertical adjustment settings on the screens yet and I need to re-program my Harmony One but I'm close. Also note the bigger screen actually provides a 2.40:1 Aspect Ratio which is even better.
Final touches yet to come:
- Black Valance to cover the screen enclosures and chains.
- Masking material placed on the underside of the lower screen to eliminate reflection.
- Cable management coming from screens power and remote cables (not that visible but its there).
So, if you have the room and currently have about a 100" or smaller 16:9 screen, my approach may be an alternative solution. If you check online for 2.35:1 electric screens with some sort of masking, you will see prices ranging from about $2000 to about $3000! The cheapest I have found (for about $1500) is an Elite Osprey Dual Projection Screen which is a new solution and consists simply of a dual screen which drops down from the same enclosure (basically my set-up except I have two enclosures).
2.35:1 Projection solution (WIP):
At this point, if I had the zoom capability of newer projectors, I would be done. Sure, I would loose out on some resolution and black bar pixels would be wasted and possibly have a dimmer image, but I would be done.
So at this point I have two obstacles: (1) there is no way in hell I will spend upwards of $2000 on an Anamorphic lens and even B stock is not do-able (at least not right now) AND (2) I love my projector and I will not replace it. So the search continued, until I read about Do-It-Yourself Anamorphic lenses........
Most projectors have a "vertical stretch" which basically takes a 2.35 image with the top/bottom black bars and stretches it up and down, so that the image ends-up filling the full 16:9 screen (the image becomes skinny). What an anamorphic lens does is stretches the image horizontally (left/right) so that the image looks normal again, but now the image extends beyond the 16:9 screen on the left and on the right, hence the need for a 2.35:1 screen.
Through my research, I have come to learn that one can build an anamorphic lens by the use of what are called "trophy" prisms. These are simply glass wedge shaped recognition awards/trophies that are sold and engraved to give to deserving employees and cost from about $30 to $150 each (here are a couple of links for your information):
http://www.massillonplaque.com/produ...4&productid=85
http://www.precisioncrystal.com/cata...tal-wedge.html
Using two of these (without the engraving of course) and placing them in front of the projector in a certain angle, results in the said horizontal stretch of the image. Here's an image to help explain the concept.
There are many sources with better details and information about DIY anamorphic lenses available, so I will not reinvent the wheel, but here are a few links which may help (I thank Brain Sturgeon, Big Daddy and the AVS Forum for the resources):
http://www.zuggsoft.com/theater/prism.htm
http://www.avsforum.com/avs-vb/forumdisplay.php?f=174
https://forum.blu-ray.com/showthread.php?t=104914
This is the approach I am taking. I do not expect it to be the best but as an entry-level, get your feet wet, sub $200 approach, I am willing to give it a try. In the next few weeks I plan on making head-way on this, afterall I've already got the freaking screen, so talk about lighting a fire under my @$$. I will post my findings and progress. Stay tuned.
Comments Questions Welcomed.
")
")
")
")
")
")
")
")
")
")
")
")


 Threaded Mode