I figured I would share the process I used to make all my acoustic panels. They can be built with common tools found in any garage and with materials from your local hardware store. The only exception is the acoustic material. Sometimes this can be found locally, but often times it needs to be ordered. No need to worry though, I will fill you in on where you can find it
 Tools:
Tape Measure
Saw (chop/miter works best)
Staple Gun
Cordless screwdriver/drill
Hammer
Pen/pencil
Materials:
1x2 (8ft in length typically) boards
1x4 (optional for hanging)
Wood Glue
Screws (I used drywall screws)
Staples
Picture mounting hardware (if hanging, pics below)
Inexpensive fabric (more on this later) 52" Minimum (most fabric I have found is 1 yard wide)
Fabric of your choice that will be visible 60" minimum (again it will likely be 1 yard wide)
Acoustic material - Roxul 60, Owens Corning 703/705, rigid fiber board
You can find acoustic material at local HVAC dealers or on the web at
http://www.atsacoustics.com/cat--Fib...ards--106.html
Once you have all your tools and materials your ready to start building
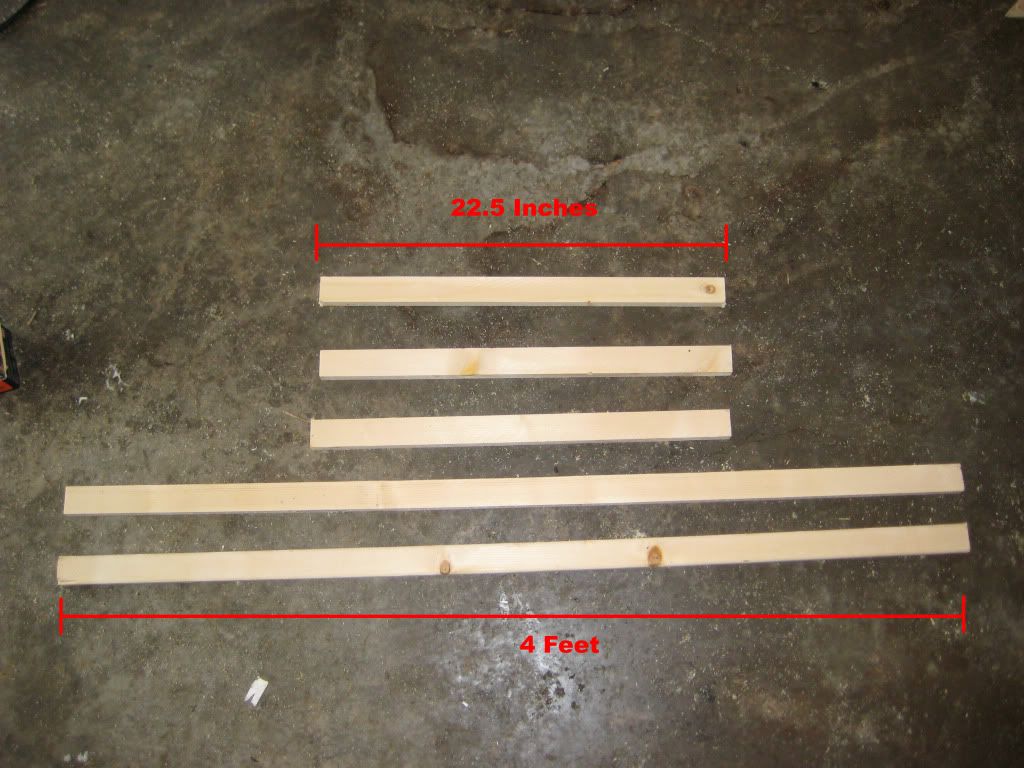
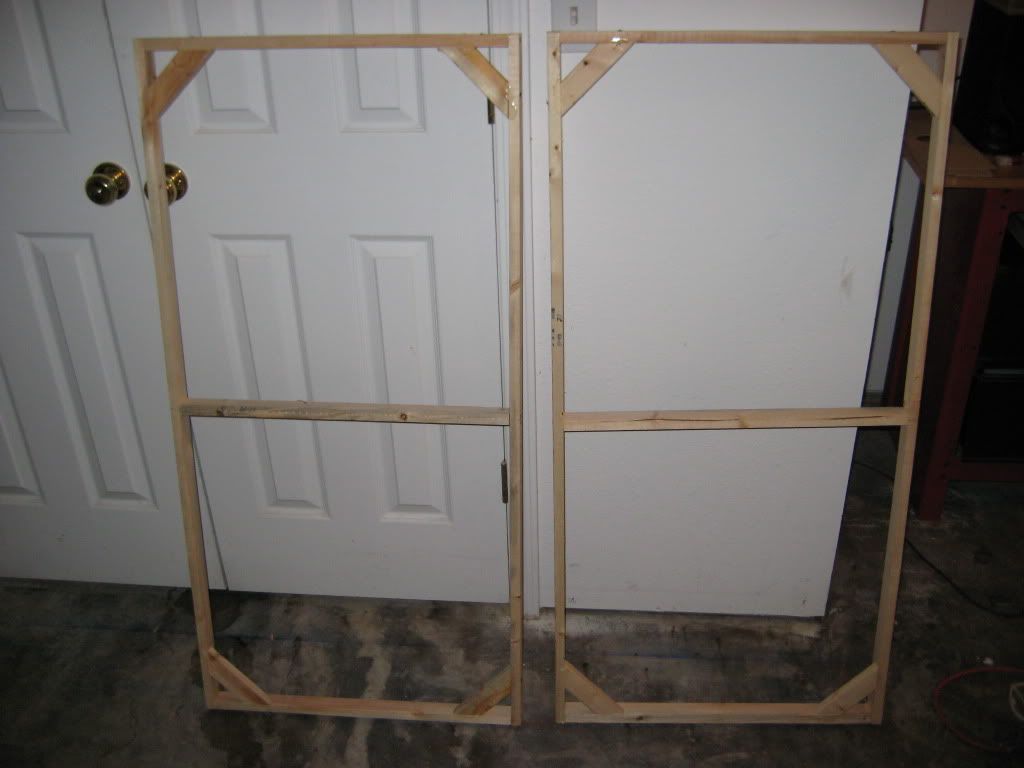
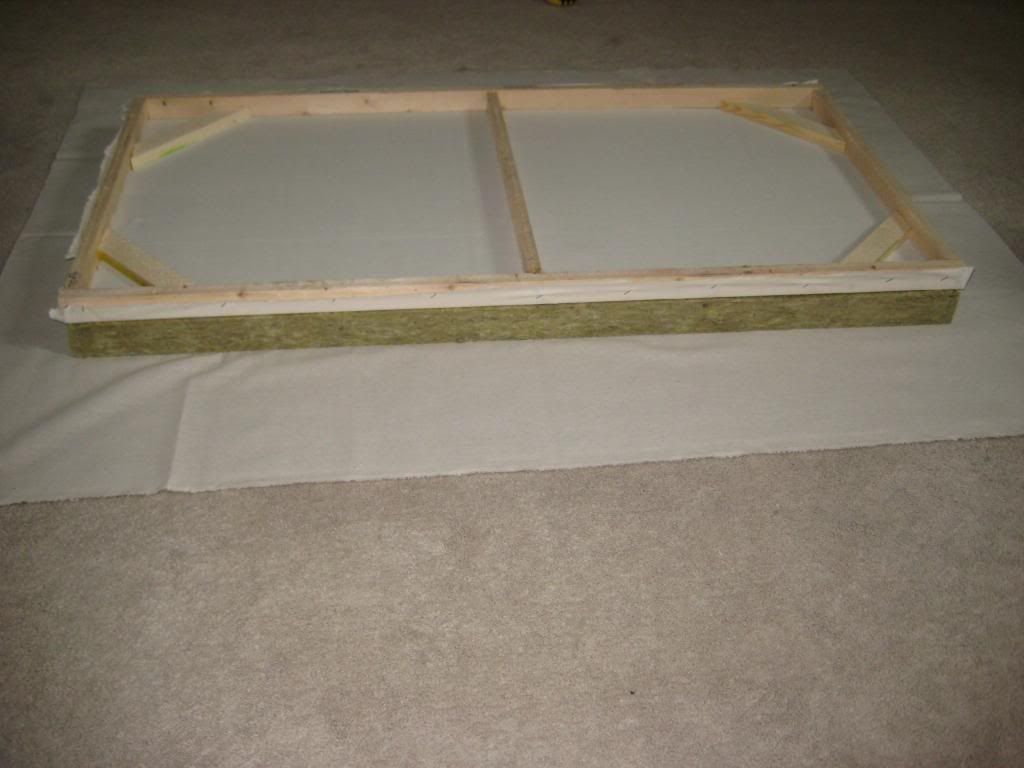
The first step is to cut the 1x2's to their proper size. for each panel you will need 2 boards that are 4ft in length and 3 boards that are 22.5 inches in length.
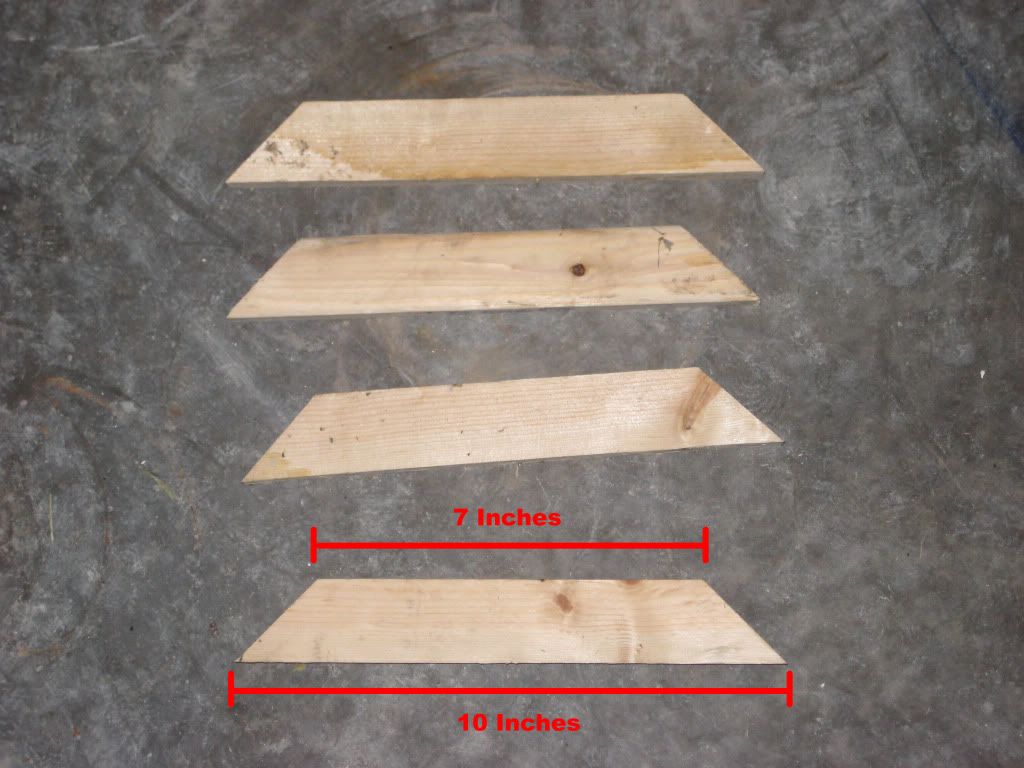
Corner braces are optional, but I suggest using them and it will sturdy your frame and keep it from warping. This is especially helpful if you decide to hang them. You will need to cut 4 pieces that are 10 inches in length and have a 45 degree angle inward that make one side 7 inches. The measurements do not have to be 10 and 7, but it just happened to be the size that I cut mine and am using it for reference. Here is a pic of what they should look like
Now that you have all your pieces cut, you are ready to lay them out to get ready for glue and securing them with screws. The shorter pieces should be placed
inside the longer pieces. Where you see red is where the corner supports would go if you decide to use them.
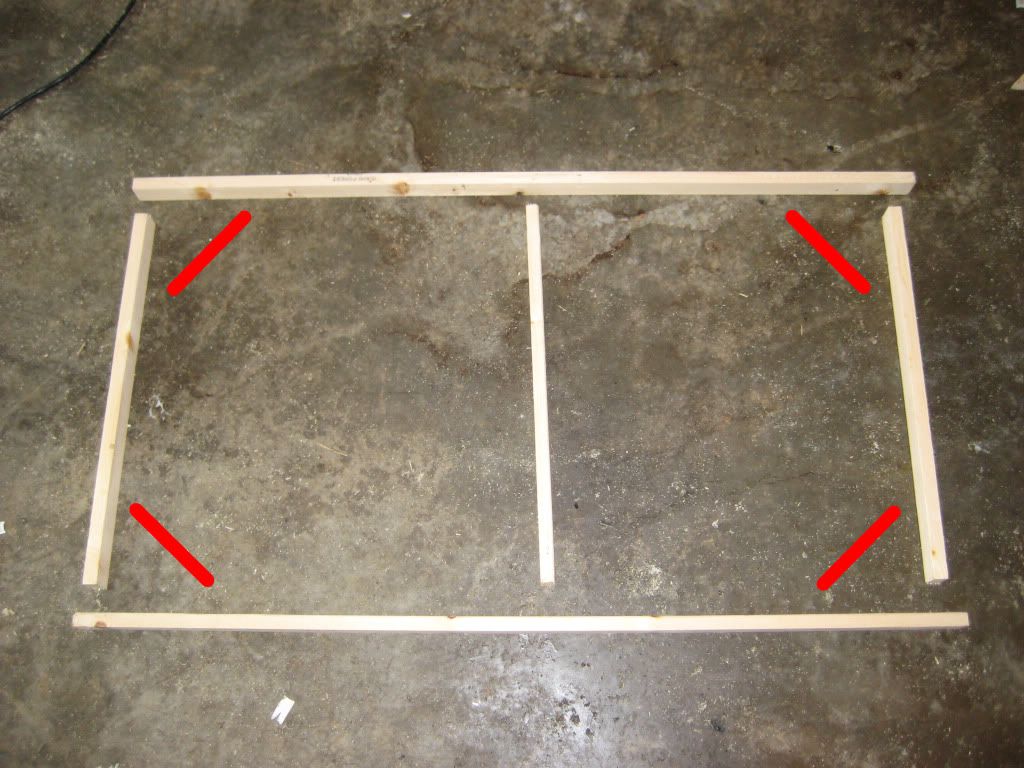
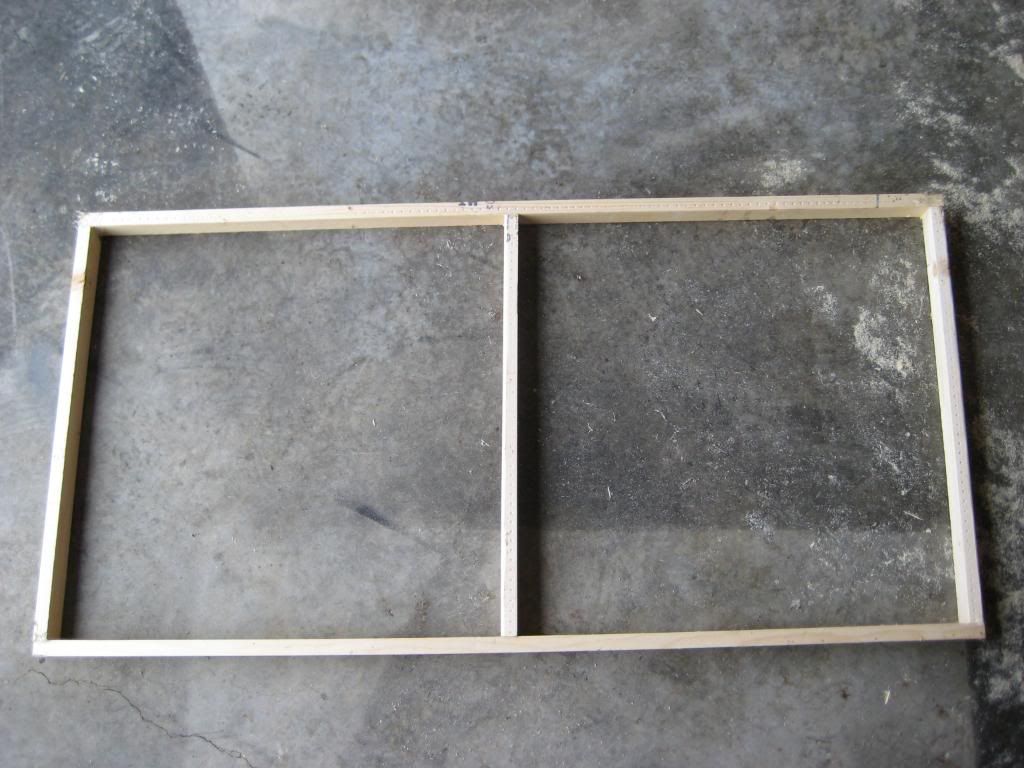
To start connecting, put wood glue on the end of each short piece and then screw in one screw on each corner from the outside of the longer piece into the shorter piece. For the corner supports, put wood glue one each end and then screw them into place. It should now look like this
With corner supports
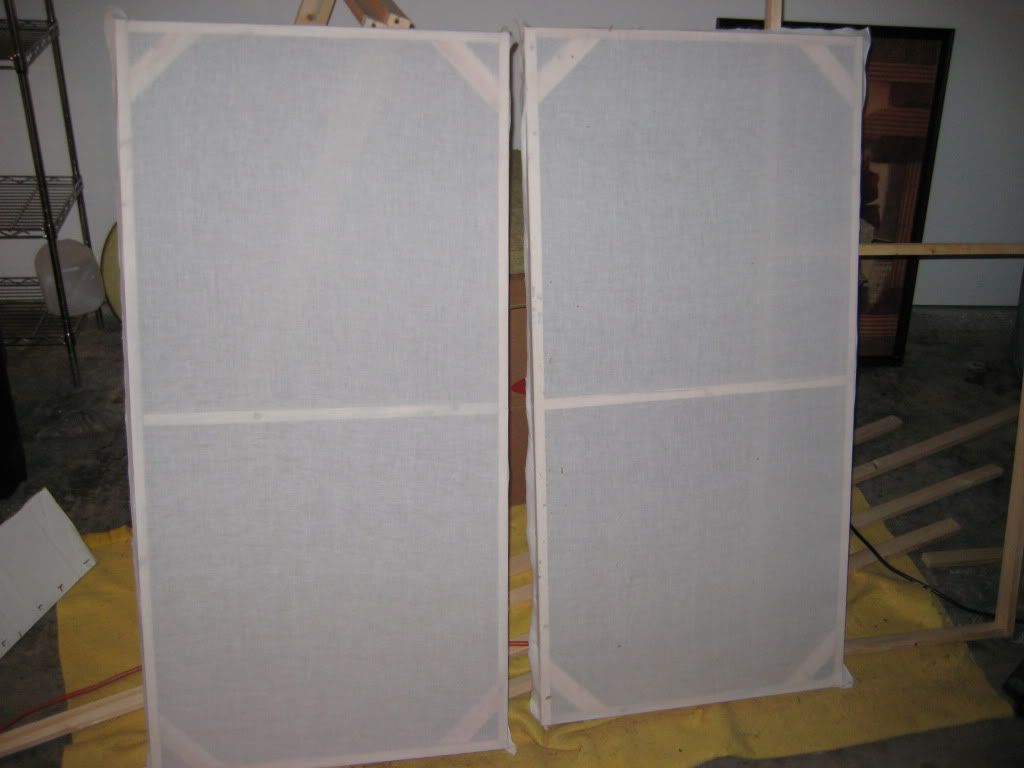
Once you have the frame built, it is time to start wrapping your first sheet of fabric around the frame. There is no specific type of fabric to use here. Use something in expensive as it will not be seen. Do choose something that will allow air flow. It it allows air flow, it will allow sound waves to travel through it. A test for this is to pull the fabric tight and blow through it and if you can feel your breath on the other side, it is good to use.
Staple one side of the fabric to the
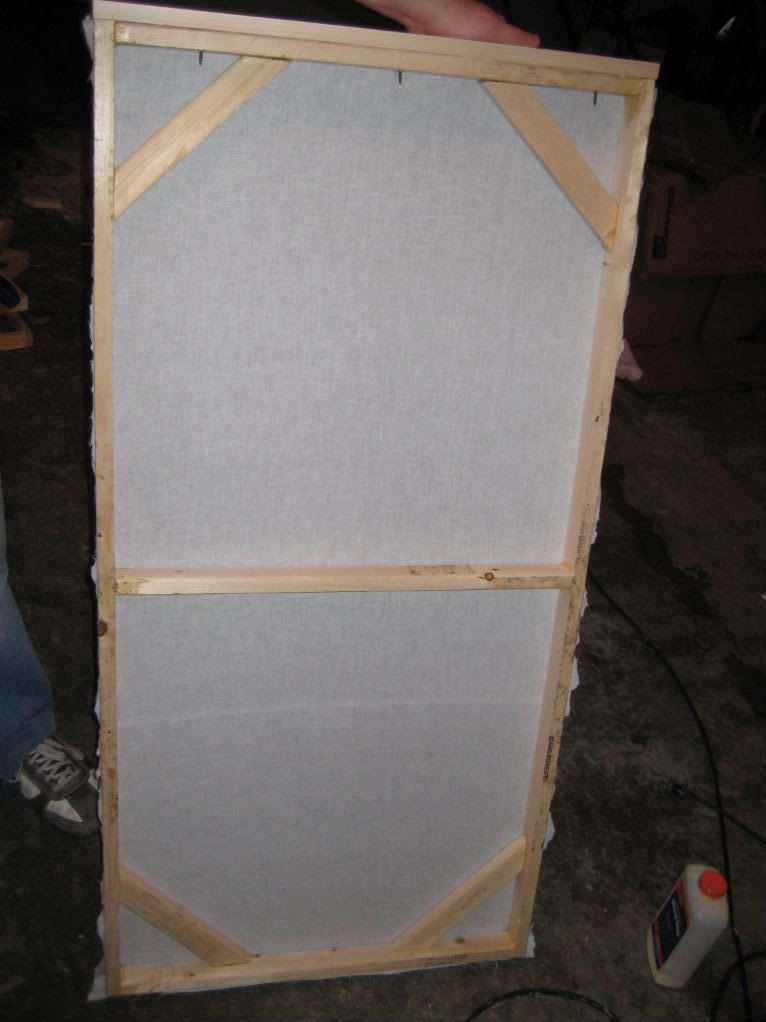
sideof the frame. Then pull tight the side that is directly opposite the side you just stapled and then attach that side with staples. Repeat with the 2 remaining sides. This acts as a backing for the acoustic material. Here is a panel wrapped with the first layer of fabric. If the staples stick out a bit, use the hammer to tap them down so they are flush.
Front view
Back view
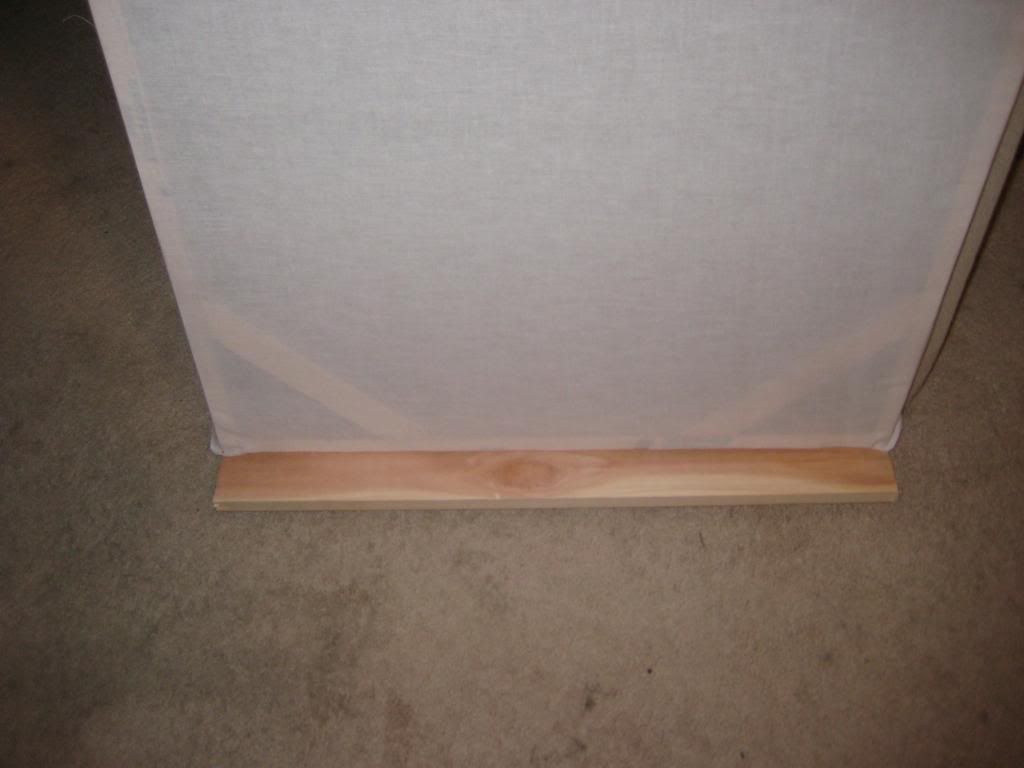
If you want to hang the panel on the wall, the fabric may hold in the materials, but I suggest a bit more support so it keeps shape over time. The best way I found to do this is my simply cutting a 1x4 to 2 ft in length and screwing it on to the bottom of the panel. It will leave a 2 inch lip on the bottom of the panel that fits a 2 inch think acoustic fiber board perfectly. Use a few screws to secure it to the bottom.
A side view to show what it looks like. This will actually go at the bottom
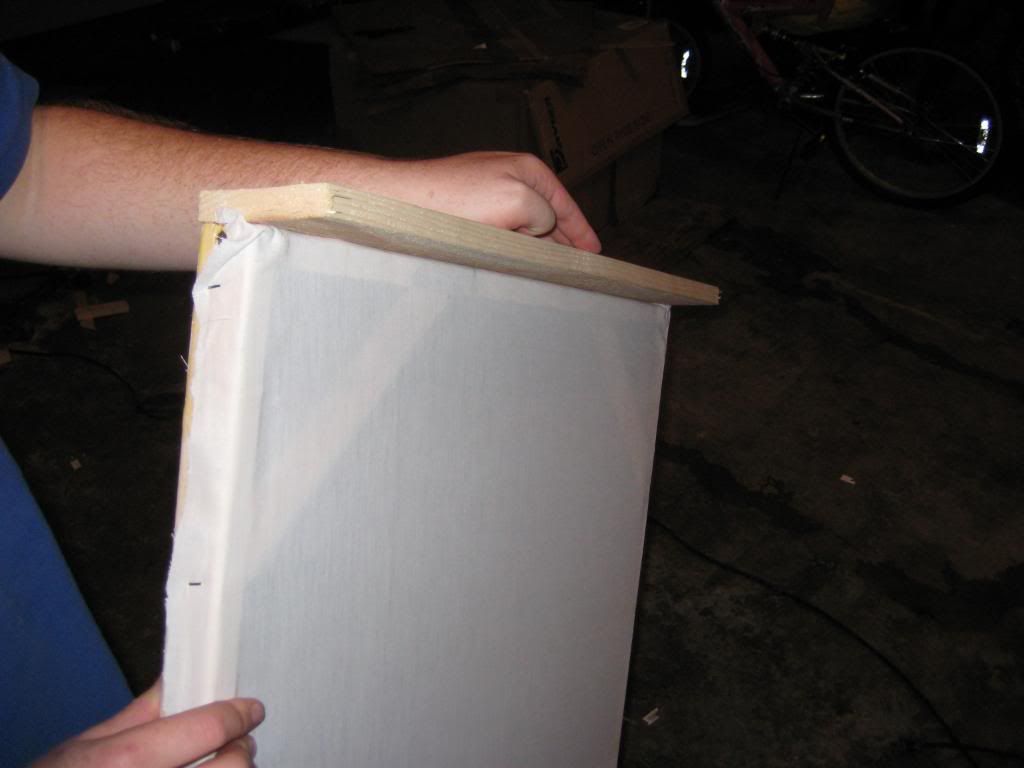
Here is what it will look like from the front. See how the lip is now there to support the acoustic material
Next, lay down the 2nd type of fabric that you chose. This will be the one that is visible. Again, choose something that you like and will look good in your room. Same rules apply with the blow test.
Once your fabric is spread out, place your sheet of acoustic material on top of it. Try to center it as much as possible. It should look like this

Then place the wrapped frame on top of the acoustic material with the fabric covered side toward the acoustic material.
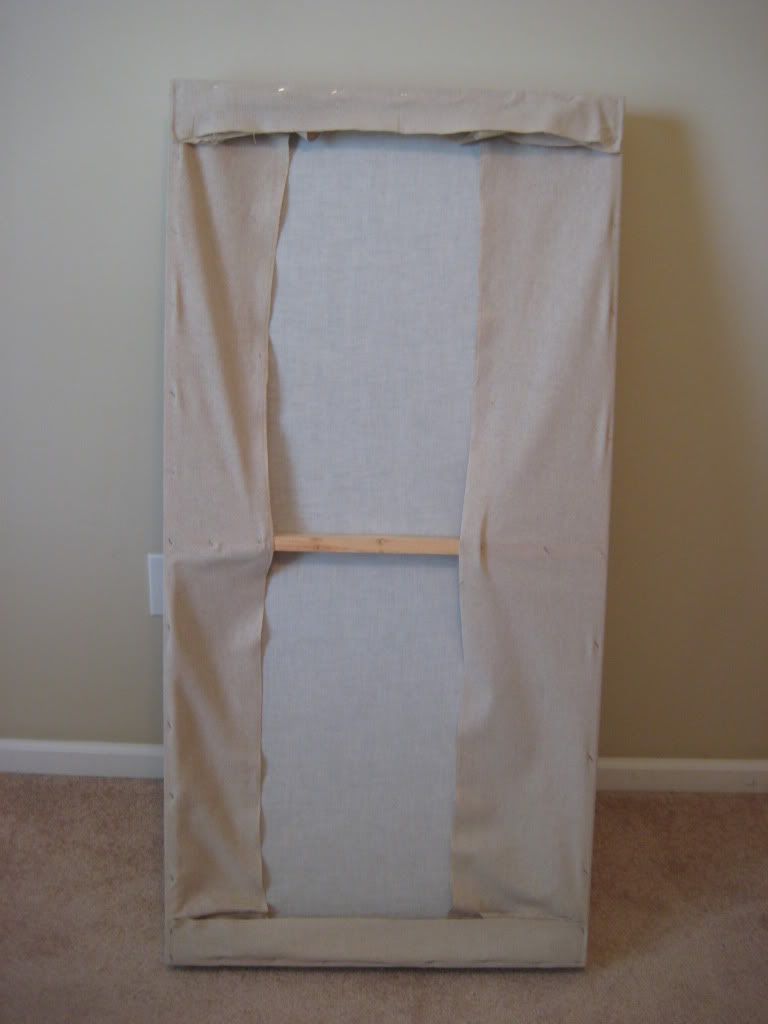
Now, just as with the other fabric, start with one side, preferably the longer side, and staple it to the
back of the frame. Next, staple the side opposite side of the one you just stapled. Make sure to pull tight and stable to the
back. For the 2 shorter sides, it is a bit tricky to do and to explain, but you start to fold the side in and then fold the top down. The best way to describe it is just like you are wrapping a present, but don't make the cloth pointed, Try and make it so there is a straight crease that follows the edge of the panel. The pics should give you a better idea. Again, use the hammer to tap down any staples that are not all the way in or flush.
It may look a little loose on the back, but the fabric is pulled tight. You can trim or staple any excess fabric. This side will not be seen so no need for it to be perfect looking.
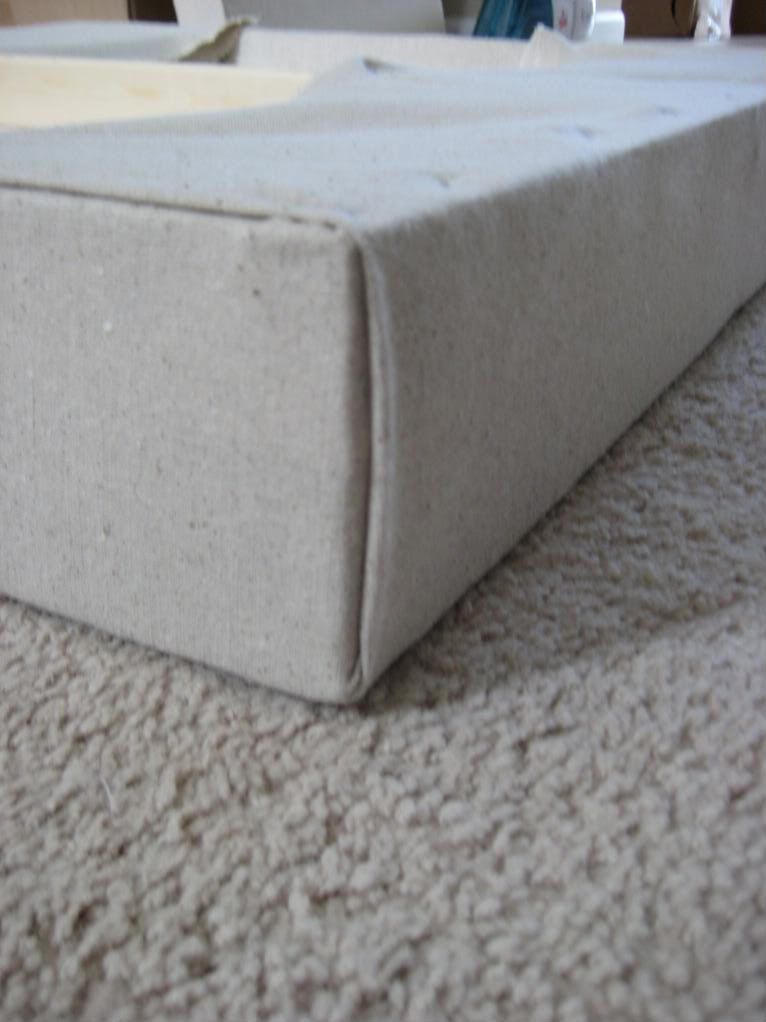
Here is one of the corner
At this point you are done with the panel and can use it as is. If you want to hang it there are a couple more simple steps.
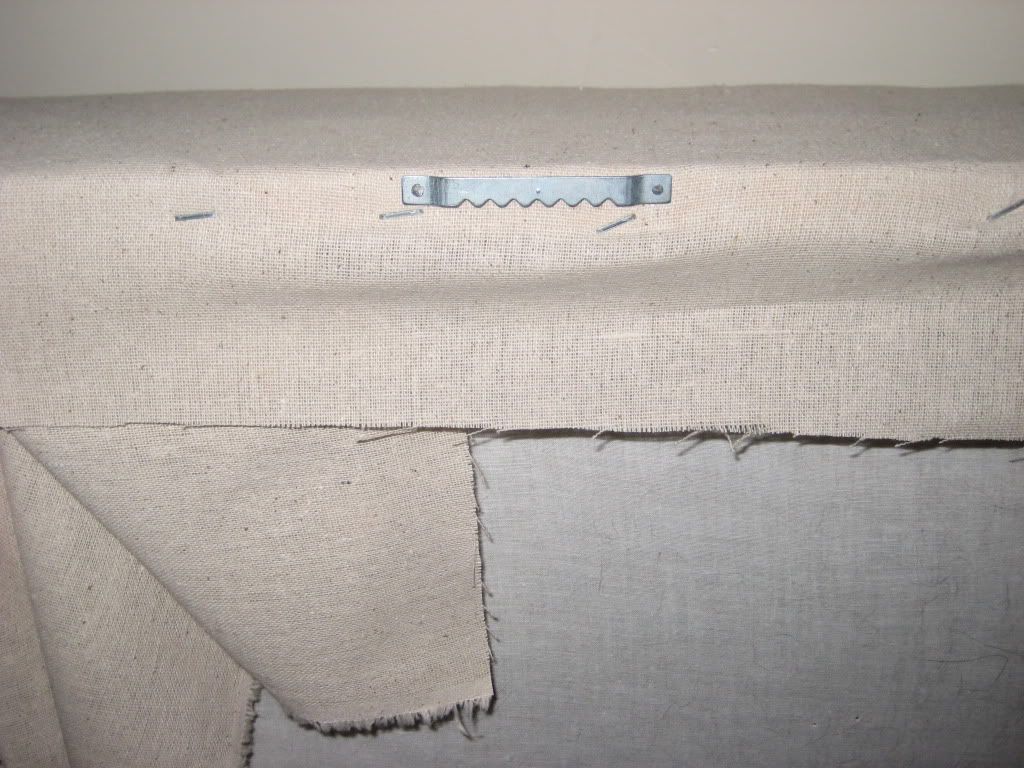
Use the picture hanging bracket and nail it to the back of the frame. Simply use a zip-it or drywall anchor where you want to hang the panel. A stud will also work great (obviously). Then insert the screw and hang the panel just like you would a picture. For smaller panels, one in the center may work. For larger panels, it is a good idea to use 2. This will support the weight and make sure the panel is level for aesthetics too. That's it, your done and now have acoustic panels on your wall.
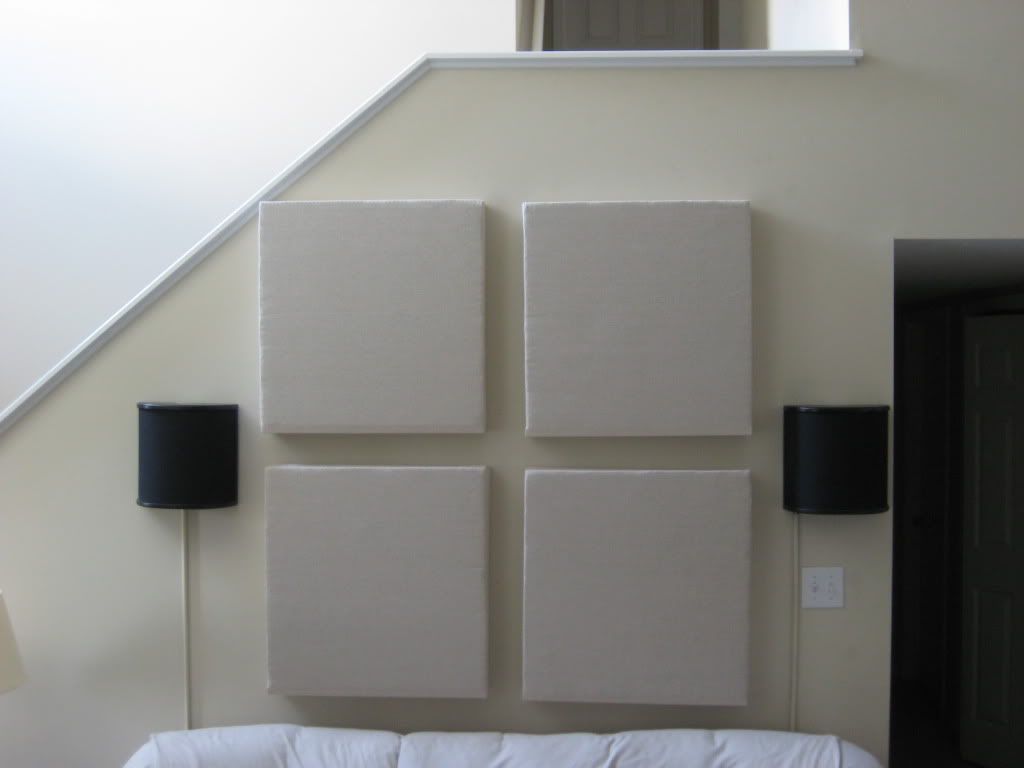
Finished pics
Smaller panels hung on the wall
More pictures of my panels can be seen in my gallery.
This same idea can be used to make panels that are smaller or thicker (bass traps)
For 2x2 panels you will need 2 2ft pieces of board and the same 3 22.5 inch sections and lay it out just as you did the larger ones. The rest of the process is the same, but you will not need as much fabric. Also, no need for the corner supports as this is a pretty sturdy frame at this size.
For thicker bass traps, the frame and process is exactly the same, but add a few inches (at least 4, but a few more to be safe) to your fabric length.
I have built a couple of 8ft tall bass traps. The frame concept is the same but you will need 2 8ft pieces, 4 of the 22.5 pieces, and 4 of the corner supports. You will need roughly double the length of fabric.
Give me some feedback as to what descriptions need more explanation and I will try to clarify and update the thread with anything that might be confusing. Enjoy

")
")
")
")
")
")
")
")
")
")
")
")


 Threaded Mode