Terminating Flatline Speaker Cable.

I thought some members might like a short and detailed blog on how to go about terminating flatline speaker cable, in this instance I am using Nordost Blue Heaven. I bought 2 meters with the intention of creating a single centre speaker cable which would be bi-wired. I would end up splitting the cable in two as 1m length was plenty to reach between amp and speaker. The second length will find another use which I will explain at the end.
Step 1: As you can see the Nordost Flat line is divided into 4 equal parts. If you are bi-wiring you need to split the single cable into four short lengths. I cut down approximately 100mm (4 inches) for termination. See Figure 1.
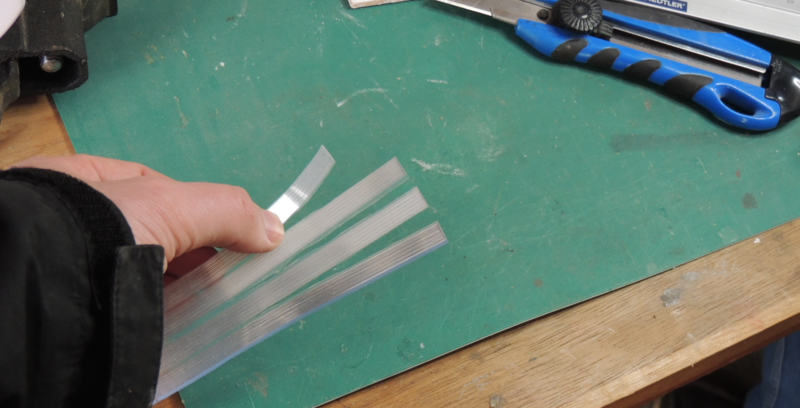
Figure 1: Split cable into four equal lengths.
Step 2: This is the most difficult part and involves stripping each segment back to expose the fine silver cables. Approximately 12 in each segment. I did not have a dedicated flat cable wire stripper so I found the best method was to use a very sharp blade the to individually cut and pull back each wire individually. See Figure 2.

Figure 2. Strip back Teflon coating to expose silver wire.
Step 3: Simply twist the individual wires to form one thick connection. This will help with soldering. See Figure 3.

Figure 3: Twist individual wires into one thick connection.
Step 4: Insert the thick connection into the banana plug. I am using a double clamp gold plated z plug. You first loosen the screws in the z plug and insert wire. Once snugly inserted screw down firmly. Using silver solder to fix into place for more secure setting. See Figure 4.

Figure 4: Z-plugs soldered into place.
Step 5: Screw the clamps securely onto z-plugs. I am sure I am not using the correct terminology for this plastic segment. See Figure 5.

Figure 5: Z Banana Plugs securely fixed to cable.
The final stage is not necessary but I feel makes the termination look more professional. I bought these cable shrink wraps from an online retailer and the look the business. Simply use a heat source to shrink the wrap into place and you end up with a nice end result. I used a low powered heating gun. See Figure 6.

Figure 6: Completed cable.
The remainder of the 1.0m cable was then split into two and I will make myself a spare set of RCA interconnects. See Figure 7.

Figure 7: Spare set of interconnects in the making.
I hope this helps some members. Cheers.
")
")
")
")
")
")
")
")
")
")
")
")


 Threaded Mode