[As interesting as this riser looks to me, would it be any more effective than a subdude or great gamma?
QUOTE=DIY_HD;4294142]Inspired by all the great posts here, I designed this riser to prevent any resonant vibrations. It's as solid as a rock and weighs 130 pounds (Est). WARNING: If you build this, make sure you have someone to help you move it. If you dropped this on your foot, it would crush every bone in it. You would probably injure your back as well.
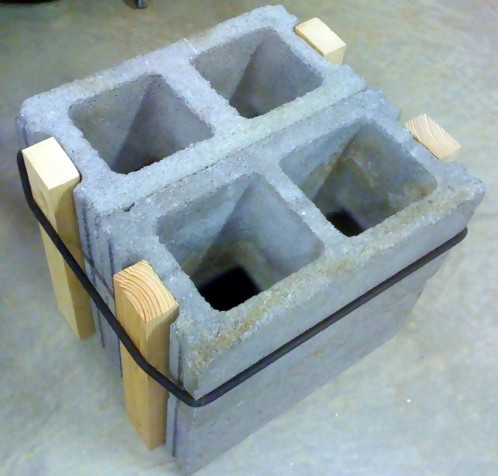
Undaunted, I set about to raise and decouple my sub in such a way that there would be no buzzing, humming, or rattling. I designed it around the size of a cinder block (8" x 8" x 16") which when laid side by side ended up being pretty near the perfect size for my sub. If your sub is larger, you could insert some additional 2x4s between the blocks or on the ends to extend it.
First I got 4 cinder blocks (about $1.25 each at Home Depot).

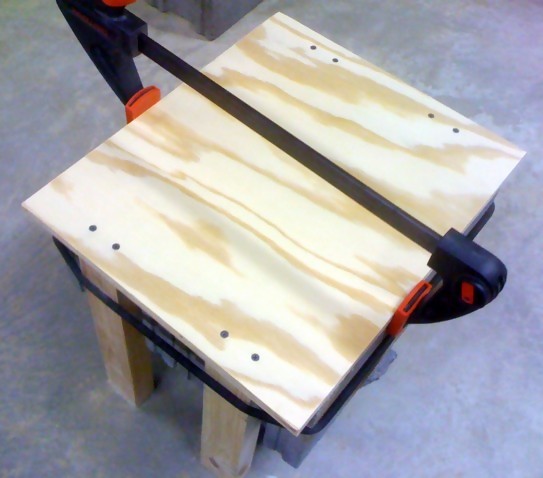
I cut four 2x4s the same height as the blocks stacked up (about 16"). I ripped them down to 2.5" wide so they would fit easily between the feet. If you don't have a table saw, you could use 2x2s. I used a bungie cord to hold them in place, but you can use masking tape instead. Cut a piece of plywood the width of the cinder blocks. I cut them a half-inch longer on each end, but if you don't intend to cover it, you can cut it flush to the 2x4s and run the end panel all the way down covering the plywood.
Pre-drilling 7/64" holes and using 2" drywall screws, I attached the bottom to the 2x4s.
I then removed the bungie cord and placed the base on an old piece of carpet. Since I had sanded the bottom smooth with 200-grit paper, I didn't want any sand on the floor (from the cinder blocks) to scratch up the surface. I then placed the 4 cinder blocks in position between the 2x4s.
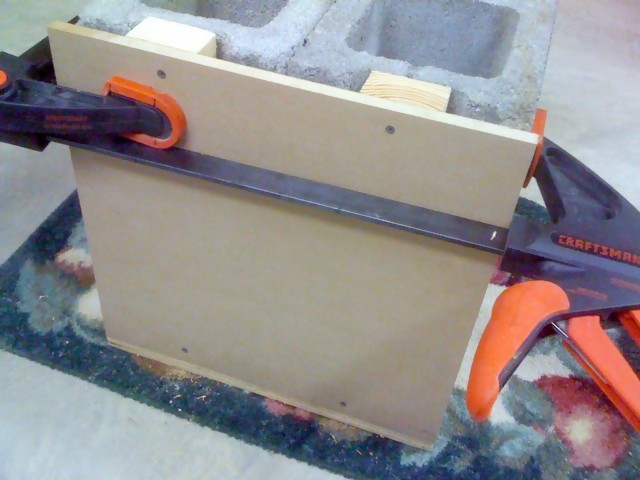
I cut the end pieces and screwed them to the 2x4s using 1 1/4" drywall screws. I used clamps to hold everything in position, but again, you could use tape or bungie cords. I wanted the 2x4s to hold the blocks tightly, so there can be no movement. Once the ends are in place, I measured and cut the sides.
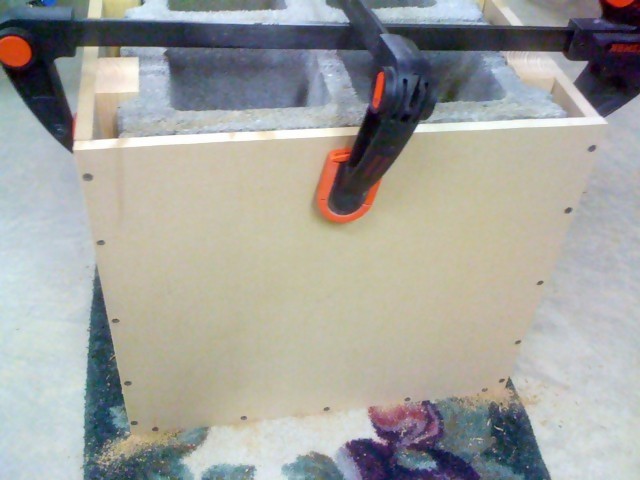
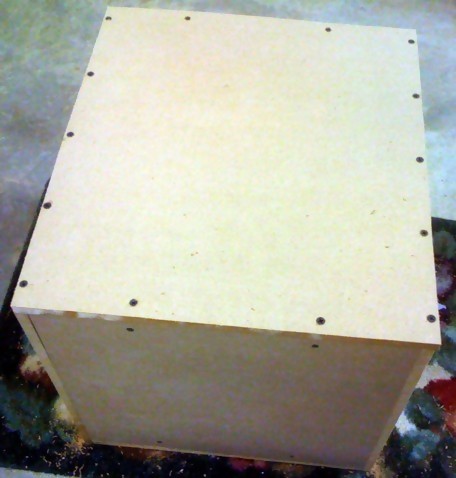
The sides I screwed to the bottom plywood and the end Medium-Density Fiberboard (MDF) panels.
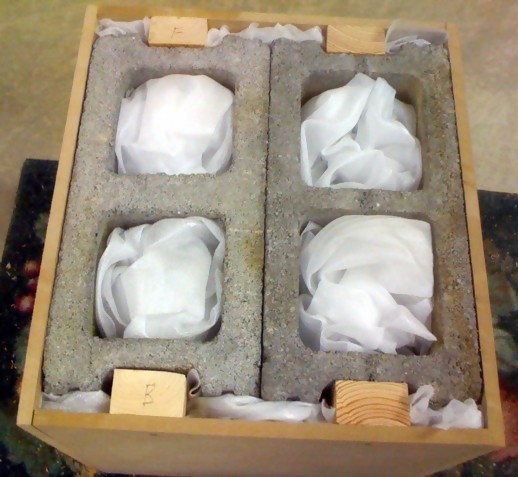
After the Sides were in place, I lightly filled the spaces with microfoam to prevent them from acting as resonance chambers. Probably not necessary given the length of low frequency sound waves, but I wasn't taking any chances and I had the foam from empty boxes with the packing still in them.
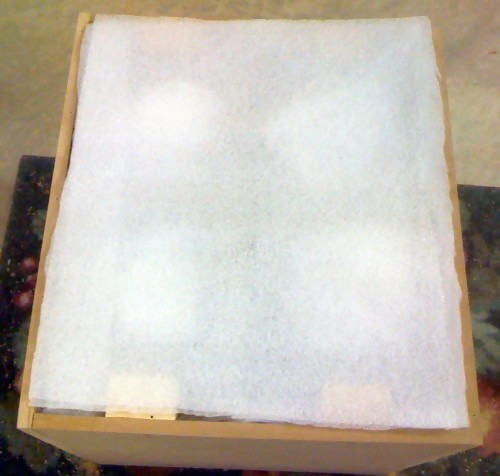
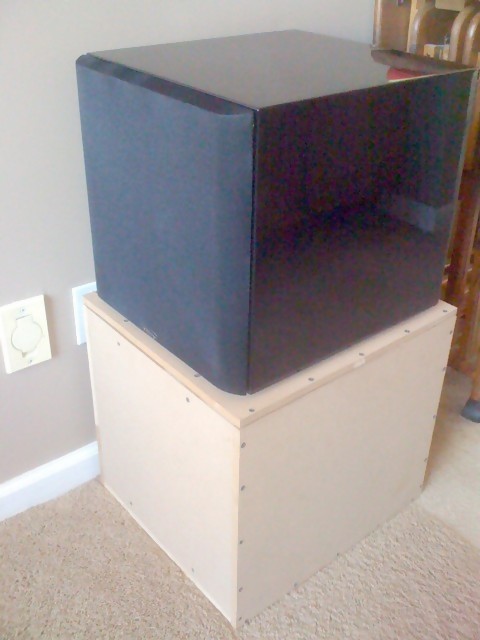
I put a piece of MDF on top and traced the underside with a pencil, then cut the top. I put 2 layers of foam on top of the blocks and screwed the top on. The 4 screws that go into the 2x4s are 2" screws because those are for structural support. When screwing these I clamped the ends to get a nice, tight fit. Now all I need is some black material to cover the sides and top, kind of like a big sock.
Since I raised it from the carpet, I removed the speaker spikes and replace them with the rubber feet. How does it work? Well, the glasses in the cupboard were rattling, but the riser didn't make a peep. It's as solid as Gibraltar. It's not a SoundTrap, but it cost less than $20.
[/QUOTE]
")
")
")
")
")
")
")
")
")
")
")
")


 That was good


 Linear Mode

